
DIY Food Cozy
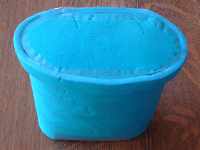
Simple, Free, and Light
When cooking on hikes, you will probably stick with easy, rehydration style meals.
After packing in the fuel and stove, spending time getting your water to boil, and then trying to heat your food, it's a shame to have most of the heat just escape into the wind.
To make your cooking tons more efficient, use a simple food cozy to insulate your meal.
Making your own cozy is simple and takes about 10 minutes, 15 if you're a perfectionist.
Hey, there's now a NEW, IMPROVED COZY!
Here's the steps for the original version:
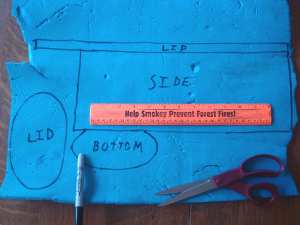 This size food cozy will fit a Lipton's Sides pouch or a quart zip-loc very nicely.
Save an old blue foam pad. I wear these out in my Wilderness First Aid training, but you could buy one for under $10 and make 10 cozies from it.
Get a Sharpie pen, ruler, scissor, and packing tape.
Lay out the cozy pieces on the pad.
The measurements in inches are:- Side - 15x6
- Bottom - 5.75x2.5 oval
- Lid - 6.25 x 3.25 oval
- Lip - 18x1
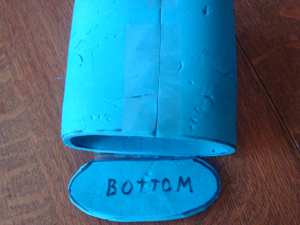 Tape the Side piece into an oval.
The Bottom piece should fit snugly inside the oval.
If the Bottom is too small, you can trim the length of the Side and retape it until it is a snug fit. If the Bottom is too large, fine-trim it until it fits.
Tape one flat edge of the Bottom to the Side piece, as shown. This should allow the bottom to be pushed into the Side piece, creating a floor of the cozy.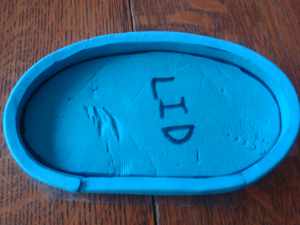 Lay strips of tape on the top of the Lid piece and lay it upside down so the underside of the lid is facing up and there is sticky tape around it.
Carefully press the edge of the Lip piece into the tape right next to the edge of the Lid. Work your way around the lid.
When the Lip is all around the Lid, there will be a bit left. Snip this off so it butts right up to the start of the Lip, then tape the start and end together.
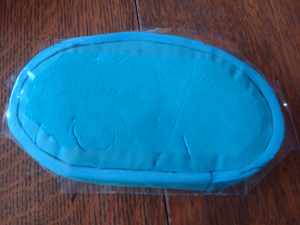 Flip the Lid over and trim off the excess tape.
 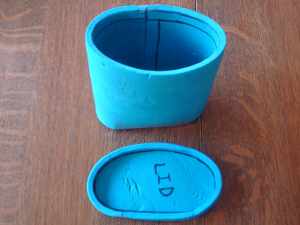 Here is the completed food cozy.
Once your meals are ready, you can leave the bag in the cozy so the food stays hot longer and your hands are protected.
To pack, the bottom can be pushed inside and the lid slipped inside. Then flatten it into whatever space you have available in your pack.
If you're careful and don't spill food on it, it also makes a pretty comfortable pillow!
This lid should now fit over the top opening in the cozy.
If you made it too small or too large, hey, it's just tape - try it again.
Hike On: Menu Planner
All Comments:
Mar 05, 2012 - Martin
Hi Dude,
Thanks for this instruction, it made me want to make my own, so based on the above instruction, I made my own cosy. Only different, as I had different material lying around. I think mine is lighter (16 grams), and multifunctional, though probably less durable.
I used the material that I had lying around to put behind for insulation, and cut out a large rectangular and 2 long triangular pieces. Taped them together with duct tape (first outside, turn inside out so this becomes the inside, then the actual outside), and there we go, a sort of envelope. I can fit in my .6 litre pot as well as my bamboo spoon, so besides cosy, it seconds as my bag for my cooking system. If you are interested in a picture, let me know.
Thanks, Martin
Mar 05, 2012 - Hiking Dude
Martin - cool! I slip my stove, pot, and spoon inside mine also. I found it helps the cozy keep its shape rather than getting kinked and crunched so much.
Depending on the quality, some duct tape won't hold well and leaves a gooey mess.
Mar 10, 2012 - Sharon
What a great idea! Can't wait to have a go at making ours for our WHW trip :D Watch this space!!!
Ask a Question
Find more Hiking Resources at www.HikingDude.com


Follow Me
Recent Comments