Crossing Water
Planning Ahead
 When you use your map and plan out your hike, you will be ready for known hazards, such as river crossings. It will take more than a map to know the best way to cross the water, or even if it is possible to cross the water given the season and recent local rainfall. If there is a water crossing on your route, its a good idea to contact the agency that manages the trail to ask about how it is normally crossed. Your choices are a dry crossing, wet crossing, or no crossing. Having a pair of hiking sandals along just for crossings is a good idea, but an extra weight to carry.
Whenever you cross water, keep these tips in mind:
- Seal electronics in zip-loc bags
- Unhook any waist straps on backpacks so you are not dragged down by their weight if you do fall
- Cross high altitude streams in the morning if possible. As the day wears on, sun and warmer temperatures melt more snow which makes water levels rise. They tend to be lighter in the morning after a cold night.
Dry Crossing
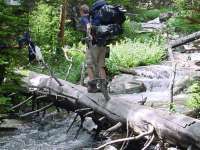
 A dry crossing is the first choice. A bridge is always nice, but there are often logs fallen across small streams. Even smaller streams can be crossed by hopping from rock to rock, but that can be a dangerous choice. Risky dry crossings often become wet crossings.
Where the trail hits the stream, it may be low enough to easily cross at some times and not at others, such as after a rain or when snow is melting. If there is no obvious way across, take 10 minutes to hike upstream looking for a safer way across. Then, come back and check downstream if no way was found. The delay is worth it if you can find a dry crossing and not too costly if nothing turns up.
Use your hiking stick for extra balance when crossing on rocks or a log if you can firmly plant it. A third leg almost always makes a better platform.
Wet Crossing
 If there is no dry way across a river and you are determined to cross, then you are obviously going to get wet. If you are on a trail, then it should be pretty obvious where other hikers have crossed. Otherwise, scout up and downstream to find the best place to cross.
Walking across a stream is dangerous. It's easy to make a mistake and get very wet. If the weather is not dry and sunny, getting wet can be deadly. You should always be flexible and willing to turn back or take a different route if the water looks too difficult or the weather too threatening.
When considering a wet crossing, think of these things:
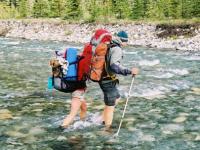
- Slow moving water should be no higher than mid-thigh on the shortest person. Water has a lot of force, the rocks are slippery, and a pack makes a person more unbalanced. Any higher than mid-thigh is too risky. If you are tall like me, your knee might be someone else's thigh.
- Fast moving water should stay below the knee. It's like having someone kicking at your shin trying to trip you with every step.
- A wider crossing usually means shallower water so look for the widest area in the stream, especially right where ripples begin. Stepping downstream of larger rocks will mean less current and often a more even bottom of gravel and sand.
- Study the river and figure out where you plan to place each step. Notice where ripples indicate rocks or faster flowing areas. Plan to drift downstream as you cross so you don't have to fight the current quite so much.
- Throw a stick in and see how fast it floats away. There is often more forceful current than it seems.
- Does everyone have shoes for the crossing? Remove your boots and put on watershoes or hiking sandals. If someone doesn't have crossing footgear, they will have to choose to go barefoot or wear their boots without socks or insoles or convince someone else to lend their shoes. Even waterproof hiking boots will fill with water and become weights on your feet - waterproof doesn't mean to wear them in water.
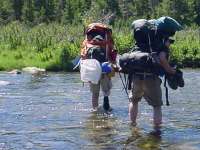
- Does anyone need help? Cross in pairs or triples, depending on the amount of navigable riverbed. Have the strongest, biggest hiker on the upstream side to break the current for those downstream.
- Face upstream or quartering upstream so the current is coming at you rather than toward your side. This helps push the top of your foot down and the front of your leg is a skinnier target than the side.
- Slide your foot forward through the water rather than lifting it up and out and then setting it back in. The constant pressure of water from keeping your foot submerged is easier to balance against than the change in pressure when your foot comes out and re-enters the water.
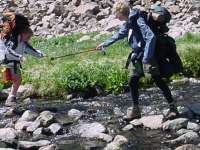
- Use hiking sticks and poles. If you only have one pole, use it on the downstream side. Place a pole firmly and make sure it is stable. Then, lean on it for support as you step forward. Water that is deep or fast will really pull at your poles and they may be more burden than aid.
- Do not use a rope. It's too much work to set up and can drown people caught in it. If the river is that strong, turn back.
- One strong hiker may ferry other smaller people across on his back. Or, he may make extra trips to bring across gear to make the crossings of others easier. Or, he may shuttle watershoes and poles back and forth for less experienced hikers.
- Keep your eyes on your goal - the far shore. Keeping your eyes down on the rushing water will make you dizzy and unbalanced. If it is clear water, look down to find your next foot placement, but then back up to the shore.
 I got to make 9 crossings of a freezing stream in Wyoming on one hike - after the first 3, I couldn't feel the cold anymore. :-) Actually, I took some extra time to dry off and warm up after that, but it could have been a bad situation. Cold air after crossing cold water can quickly lead to hypothermia. Having your entire legs in 36 degree water from snow melt for 10 minutes can really chill you down. If it's a nice, sunny day, rest in the sun after crossing to warm back up. Otherwise, use a camp towel to quickly dry off and rest or walk around until you are warmed up. Use your fleece layer or rainsuit to get warm if needed.
Worst Case
 If you do slip and fall in, you have little time to self-rescue. Before anyone starts across, you should have already discussed the procedure if someone falls.
- Position someone downstream with watershoes on, a rope or long stick ready, no pack, and minimal clothing needed to stay warm. His job is to throw a rope or jump in after a person or pack that may be lost. Whether you can do this or not depends on the size of group, strength of hikers, weather, and river size. Once one person is across, have him position downstream so both shores are covered.
- If you are positioned correctly and you do lose your footing, your feet should be swept from under you downstream and you will fall to your knees and hands rather than your rear. This is preferred since its a good idea to keep your torso out of the water to stay warm.
- If the water is lower than knee high, and fairly flat bottomed, a person should be able to stop himself quickly and pop back up onto feet and hands. This gets his body and pack out of the water. Then, when balanced, stand up and continue across.
- If water is deeper, the person may have difficulty gaining his feet. If he can not stop quickly, he should shrug off his pack and then try to stop and stand, either grabbing his pack or letting it float away. Behind large rocks, there is usually lighter current.
- If you are being swept downstream, float on your back with your feet downstream to absorb hitting rocks. Use your hands to steer and work your way toward shore.
All Comments:
May 06, 2018 - Ed Fritz
I learned a few things reading about stream crossing. My wife and I have already had our experiences (both good and bad...and expensive) during day hiking over the years.
Well, now that we are backpacking, stream crossing has become a much bigger concern. On our last backpack my wife fell in a creek while rock hopping. We learned many lessons the hard way that very moment:
- Fell face down with pack fully strapped on. - Shallow water and side landing helped.
- DSLR Camera holstered to upper left shoulder, but exposed. - Yup, it got dunked. After some time in rice it survived.
- Cell phone was in a pant pocket. - Luckily the pocket turned out to be waterproof and wasn't crushed.
- Wet, potentially cold, and soggy hike onward. - I hopped in to help her, we were both wet...and heavier, too. But we had warm weather, whew!
- Injury (and the potential for worse) was the most concerning. - Bruised hip and palm made the return hike rather miserable and disheartening. Her face missed striking a rock by only a foot. Too close!
So, I've searched for solutions and found Wiggy's Lightweight Waders. I've tried them and feel much more surefooted crossing water. Thin rubber sole and still lightweight (10 OZ.). Fold into a pouch. Cinch cord for upper thigh and belt straps. And, Waterproof!
My wife tried mine and ordered her own.
Cheers, Ed
Jun 15, 2024 - Mary M.
I have just joined a class that involves easy hiking, but on the first two hikes have included stream crossings. This past one involved a crossing over driftwood branches, about 3 feet log and 4 to 6 inches lying lengthwise across the stream. It seemed to me that these could be unstable
and roll at any moment. I am afraid of injury and I am not very nimble or flexible.
I don't trust my instructor very much because he tried to
pressure on me to keep up with the group. This is something I am unwilling to do when the trail is not level. (On our last hike (where the crossing was over the driftwood branches), a number of people went off the trail to cross on a bridge, and I joined them.)
Another crossing involved rock hopping and the rocks had a lot of algal growth. The rocks were too small to place both feet. I chose to wade in the creek where the water was faster with less algae.
Jun 15, 2024 - Hiking Dude
I would prefer to have wet legs than fall and be entirely wet, so wading through instead of stepping on slick rocks makes a lot of sense. And, using a bridge seems like the obvious thing to do - I don't understand how you would go off the trail to reach the bridge, though.
Ask a Question
Find more Hiking Resources at www.HikingDude.com


 Hiking at Altitude
 Hiking in Heat
Follow Me
Recent Comments